Lighting
In my first home made building I still used (mini) light bulbs. But nowadays all model builders of course use LEDs. Not the classic 5mm LEDs but the much smaller micro LEDs that often have wiring already soldered on.
Simple mini or micro LEDs
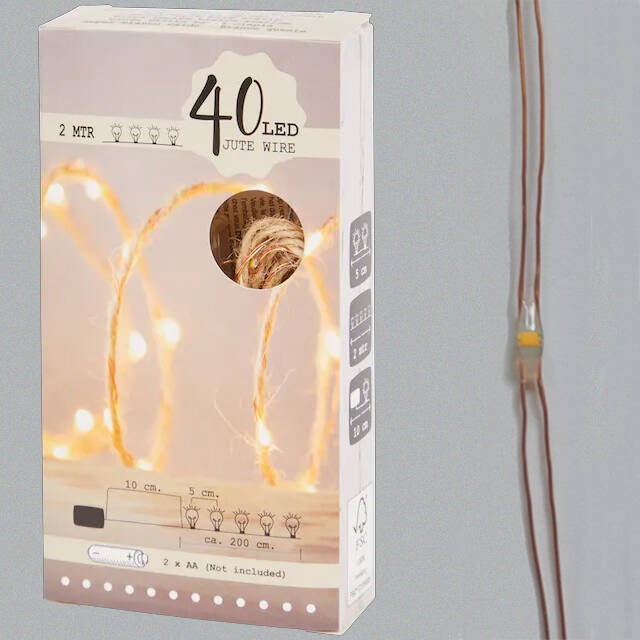
You can buy these LED's from elektronics shops or online. But I usually go looking for them in discounters of pound shops (try Christmas lights). You may need to remove some jute rope, but the decoration on the photo is basically a kind of ladder of 40 LED's, for almost nothing. The set runs on two 1,5V batteries. So they are 3V LEDs.

For the villa Kleiboer different light fixtures have been made for all rooms. Most model builders will not want to do this for their normal kits. But the first two examples can of course also be used outside: on the facade of factory, in an open shed or as street lights on a pole.

Cut the LED loose on the red line and glue it: 1. in a 3mm washer, 2. in half a bead, 3. between short vertical pieces of nylon fishing rope, 4. in a drilled-out transparant bead, 5. in a drille-out pushpin onto which a half bead has been glued, 6. together with some 'grape leaves' bij Faller to make a 'Jugendstil' lamp. Or solder them together to make chandeliers (7. and 8.). Just be sure to connect all plus poles and all minus properly, but without the plus and minus touching one another.
SMD RGB LEDs
SMD stands for 'Surface Mounted Device'. That is a LED that has been mounted on a small piece of print plate. In fact there are three LEDs in one: red, green and bleu (hence RGB). But they have been combined in one casing and are so small that you cannot see them with the naked eye, By varying the brightness of the three colours in a SMD LED, you can create all the colours of the rainbow. If all three LEDs have the same brightness, the result is a more or less white light.
A well know application of SMD LEDs are the long LED-strips. But there are also single SMD LEDs; see picture. And they are very well suited for illuminating kits (or railway carriages!). Besides the three color LEDs, a micro-chip is also enclosed in the SMD casing, to configure the colours. By changing the settings rapidly you can make the light of the LED simulate e.g. a fire, a fireplace or even a television set.

MobaLedLib (MLL)
LED-strips are operated by a remote control or a mobile phone. But with those you cannot control the individual LEDs of a strip. Here an Arduino, Raspberry pi or e.g. the ATtiny comes in handy. These microcontrollers are in fact tiny computers, that send out a code that can be read by the individual LEDs.
On the video below some exampes of light effects are shown, like welding and coloured flashlights. Here an Arduino controls a strip of SMD LEDs. But these LEDs can of course be cut loose and then, connected again by pieces of wire, be distributed over various rooms or buildings.
Controling the LEDs requires quite some programming work. Luckily others have already done that for us. Online free ready to use so called 'libraries' can be found, from which the necessary commands can be send to your Arduino or other microcontroller. With a little bit of studying everone can use those.
An example is the Open Source library MobaLedLib (Modellbau Led Library) or MLL for short; see https://wiki.mobaledlib.de/. We used MLL to operate the lights in the villa Kleiboer.
Sadly MLL is a very German initiative; almost all information is available in German only. On GitHub however there is a page on MLL in English.
It would take too long to explain all ins and outs of MLL here. Because in the mean time you can do much more than operate lights with an Arduino and MLL. If you have signals with LEDs they can be operated too. And instead of LEDs, small motors can also be controlled: e.g. for moving a windmill, a crane, the doors of a train depot or a turntable. Or a mp3-player, to play sounds for your station or a factory. The possibilities are almost endless. And new applications are being invented continously.